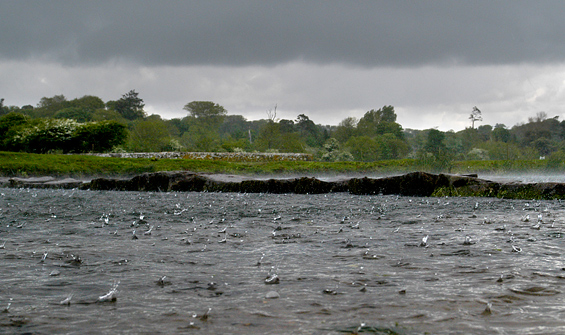
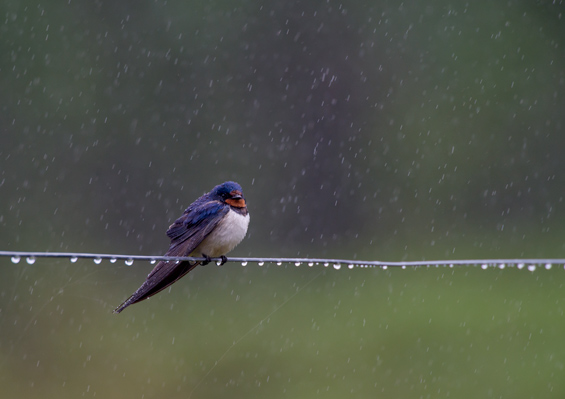
I’ve a presentation that I’ve given to various groups over the last couple of years entitled ‘Light Land and Rain’ It’s really an acknowledgement that without rain, or the near presence of rain, the landscape can often be a bland, and at certain times of the year, difficult place for exciting photography of the natural world.

It seems very appropriate now to do a small article on rain, and coping with it as I’ve just spent the last two weeks in Scotland experiencing very unlike May conditions of heavy rain, high winds and storms. Seventeen days of heavy rain, with only a very occasional respite! But when the glimpses came they were exceptional and that’s what you can get with rain.
Why Shoot in the Rain?
Perhaps the single most important reason to shoot in the rain is that most people don’t. Images produced in poor weather therefore have a degree of novelty to them as most photographers head indoors when the rain starts. It may take a bit more effort and organisation to continue shooting but it’s worth it!
What About My Equipment?
There’s the worry that any amount of rain on a camera will stop it working. Digitals are heavily reliant on electronics (a distinct advantage of using mechanical cameras is their tolerance of poorer conditions) and water is certainly not to be taken lightly but a few drops, or a light shower is nothing to really worry about and as long as you have an absorbent towel to wipe the water off you can keep working. Prolonged rain is another matter, even for cameras the pride themselves on having waterproof seals. Those designed for underwater photography are a different matter and if you intend to shoot mainly in the rain it would be sensible to invest in one of these. I use my trusty, now rather old, 5 megapixel Pentax Optio in really poor conditions or if I’m working on the shoreline. If working with the more usual DSLR’s then care must be taken in poor weather and any change of lens or storage media should be avoided at all costs. Yey even in the hardest of rain there are ways to continue.
The Cheap Option
Large sandwich bags and an elastic band is a good option, and the cheapest, and if you’re not planning serious photography in prolonged rain then this is a good way to to get out there and have a go. Cut a hole, lens size, in the bottom of the bag and push the lens through it, the elastic band can then be placed around the lens to hold the bag in place and stop rain from moving down the lens barrel. The open end of the bag is where your camera sits and allows for access to the controls. If you plan to spend a good deal of time in such conditions then it’s worth investing in something a little more substantial, but that still won’t break the bank. Such protection pieces are available from various camera stores and vary in price. If you are buying one of these then make sure it’s generous in size and isn’t to tight a fit, particularly at the camera end. A draw string here allows for the cover to be tightened up around the camera in extreme conditions.
For Longer Lenses
The type of protection discussed above won’t be large enough for the longer lenses. I’m constantly using 300mm and 500mm and often in pretty poor conditions and need both the lens and camera to be covered. I get my covers from Wildlife Watching Supplies and they are superb, not letting any water in even in the most extreme conditions. I also use their neoprene protection rings for added lens protection.
Try Before Taking Out
It’a good idea to test the waterproof capabilities of whichever type you buy before venturing out into the field. Give it a thorough test over prolonged periods of heavy rain (without your equipment in it of course!) You’ll then have confidence in how long you’re safe before any water gets through. The ones from Wildlife watching Supplies hold out all day in really heavy rain.
Use Shelter When Possible
Don’t be a martyr and be out simply for the sake of being out.  Even if you have the best waterproof covers it’s easier to photograph rain from shelter. Hides are great to be in when it’s pouring down and I’ve always loved the feeling of being in shelter, be it a tent or the van when it’s lashing down. The only part of your equipment that needs covering in hides is the lens itself as it normally protrudes a little from the viewing slats. A car also makes a good shelter and as long as you’re able to compose the shot and are not sacrificing too much then stay inside. When working from the car all my equipment is still in it’s waterproof covers.
Use a Brolly
If you have a willing helper then a good quality umbrella, one that won’t blow inside out at the slightest gust, is great. It allows you the freedom to access all the camera controls without having to ‘work inside the waterproofs’. Be careful here though, if the rain is coming in sideways, as it was in Scotland, then a brolly’s not much use. I have a clamp that can be attached to a tripod (made for me by an ex student, many thanks David!) that has a holding slot for the handle of an umbrella, enabling to you have the benefits of the brolly without anyone having to hold it! It works if the rain is constant and from above, not sideways and if there’s not too much wind. I lost one brolly in mid Wales  as a gust of wind lifted it into the lake I was photographing. I continued photographing as the brolly slowly sank about 20 yards infront of me. Of course I now make sure that the brolly is securely attatched to the tripod when in the slot!
Water On The Lens Glass
Try to avoid this as it causes difficulties, unless you particularly want the effect that water drops on the glass have on the image. It’s hard to rid water from the glass whilst in the field as it tends to smear and you’re just constantly moving the water around the glass. Use a lens hood where possible.  An absorbant cloth or leather will help but it’s still difficult to perfection once its got wet. Longer lenses tend to have a good lens hood and this stops a lot of the rain from getting onto the front element of the lens. Occasionally, however, if you dont want to miss ‘that shot’ it’s impossible to avoid. I use a clean leather to dub odd the drops in this case, ensuring that the leather is kept in a separate bag away from anything it could pick up that would scratch the lens. If you’re using smaller lenses then the problem can be more acute as the lens hoods are smaller. In these cases make sure you protect the glass with a filter – UV or a Skylight 1a – It’s worth the investment and cleaning a filter is easier than cleaning a lens and avoids direct contact with the glass of what may well be an expensive lens.
What If My Equipment Does Get Wet?
If, despite you best efforts, the camera or lens does get wet then dab off the excess water and let it dry naturally at room temperature, without any additional heat. It’s amazing what still works if dried in this way!


Excellent advice Tim, I remember one of your workshops on the Beacons in summer, it rained heavy all day.
Regards
Trev.
Thanks Trev, well remember that day and some good images came from it!
Ditto! I’ve had a penchant for photographing drips & drops ever since!